Dreamy Neutral RV Makeover for Young Couple

It was mid July…
We had already committed to a renovation for a client in Sacramento in September when this couple reached out to us, wanting us to help them renovate their new camper ASAP! We literally packed up our van with all of our tools and everything we needed to live for 4 months and headed West. After a short stint in Malibu where the project was originally slotted to take place, we ended up moving the job to Reno, NV. Our clients parents had a house there with plenty of space for our van and the camper and graciously accepted us onto their property and basically into their home. We couldn’t have been more thankful for them and the space they gave us to do the project!
Our clients really had their heads wrapped around the layout they wanted as well as the overall look. We worked together to create a very California Casual vibe in the space. Think lots of neutrals and warm wood tones. The “after” was quite the departure from how this camper came off the line. It was VERY dark and drab…and I have to say, the space we created together with our clients was literally the exact opposite!
Model: Solaire by Palomino 316RLTS
Paint Color: Benjamin Moore Swiss Coffee (all surfaces were painted this color. Walls in an eggshell sheen and cabinets in a semi-gloss).
Main Living Area

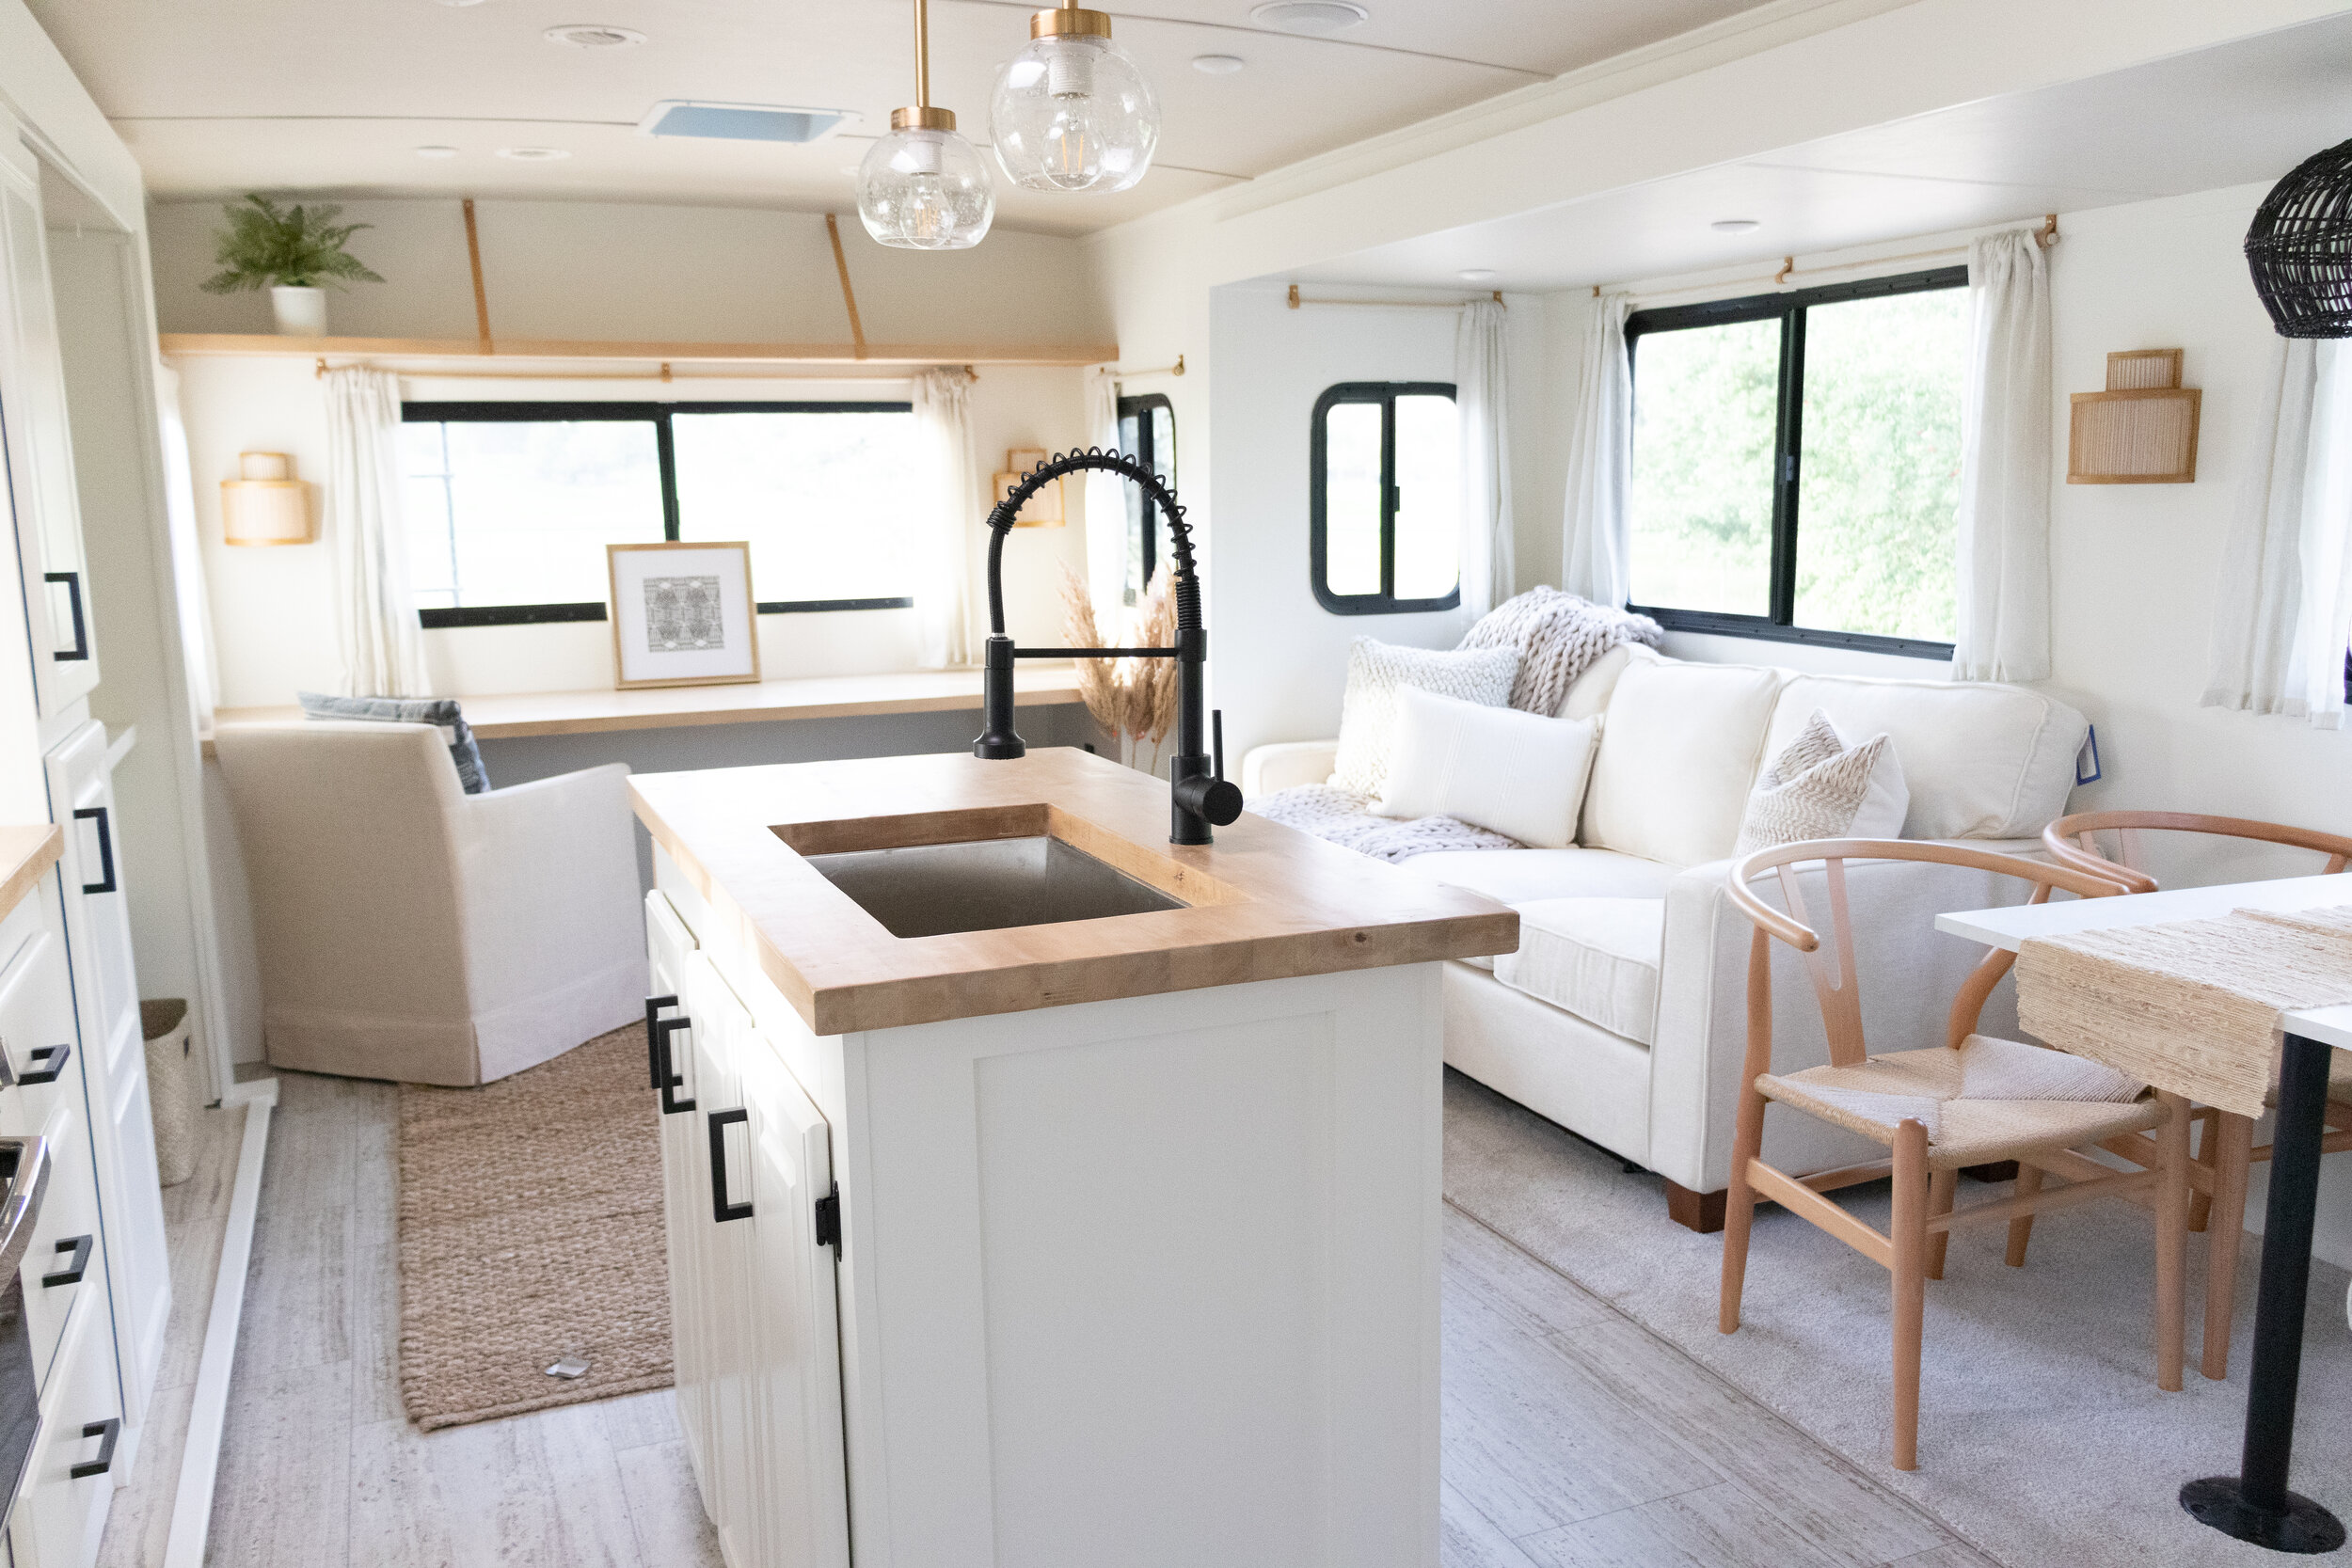
We kept the layout very similar. The biggest change was on the back wall of the camper. I’ll show you a closer shot of that later on…
As you can see, HUGE change in the brightness of this space! The door to the camper was even open in the “before” photo and closed in the “after”!
We removed both sofas, all of the window treatments, removed all light fixtures and removed the cabinets over the sofa in the back.
I’ll get into more of the details for each area below.
Office Area


Different angle, but you get it! Couch and bulky cabinets out, light and neutral desk IN!
Our clients still wanted storage for books/plants so we added the long shelf up top. The shelf needed support in the center, since it was such a long span, so we added the leather straps. So pleased with how that turned out!
To the left and the right of the sofa, there were “end tables” that were actually there to house the wiring for some outlets. We modified them to be the supports for the desk (made them taller and a bit “chunkier”).
The wall sconces are shades I purchased here. We quickly found that these “sconces” are just the shade! Oops! I was able to modify them by putting fabric inside the shade (to block the view of the fixture) and use regular push button LED lights you see on the ceiling of newer RV’s. They’re super affordable and (if purchased in the correct coloring) can look just as good as a regular incandescent bulb!
Our client had these curtains in their apartment and I modified them to hang in the camper. The chair can be found here.
The basket under the desk is a super fun feature! Our clients wanted a way to have their cat's litter box hidden so that it looked like a design feature and not just a litter box in the corner. We snagged the basket from Target. Find it here. Then cut a cat sized hole in the side! The lid comes off for easy changing of the litter!
TV/Fireplace Area


So lets start with the TV fireplace area and work our way left…
Our clients didn’t want the TV to be the main focal point of the space and had decided to get a mini projector and a screen to use instead (you can actually see the little hooks for the screen to hang on in this photo if you look closely enough). They also didn’t want to keep the fireplace and opted for more storage space under the drawer instead. We shifted the audio board down to beside the drawer and remove the upper cabinet. We made the countertop here using a concrete skim coat (I’ll show you a better shot of this later!). The end result of all of this, is a brighter, more open space that still has the same function as before!
Kitchen


So in the kitchen, other than painting the cabinets, the biggest thing we did was replace the countertops and add an extension. The nice 1.75” butcher block counters we purchased were very heavy. While this rig was equipped to haul a lot of weight, if you can shave weight anywhere, it’s worth doing! We routed out underneath the wood which saved significantly on the weight!
We kept all of the original appliances. We took out the microwave and stole a door from the shelving area near the dining table to make the empty space where the microwave was into another cabinet.
Living/Dining Area


Again, white paint makes such a HUGE difference. We did change out the carpet on the slide so it would be a bit brighter. We removed the bench that backed up to the sofa for a couple of reasons…#1 - We liked the way the chairs looked better! #2 (and the most important reason) - We were able to add a longer sofa. Finding sofas to fit in these small spaces isn’t easy. By removing the large bench, scooting the table toward the bench under the window an inch or so and put smaller chairs in its place, we created a few extra inches in length we could add to the sofa. Inches=FEET in a camper! We replaced the sconce with the same one from the office area and also replaced the light over the dining table (the shade is from World Market). Our clients wanted a lot of open shelving, so we removed the large cabinet doors and replaced the shelving inside with alder wood shelves. They turned out so beautiful!
Here’s another angle of the same space. Our clients really wanted to fit a sectional in here, so we made it happen! It turned out so well. The sofa was from Overstock and can be found here. It was SO soft and comfy! We used the legs from the original table. We needed a table that would fit the aesthetic, but also be a similar size to what was originally there (or a teensy bit smaller!). I was able to figure out that a coffee table was just the right size! So I ordered a coffee table, took just the top out of the box, and installed the original legs to the top!

Bathroom

This tiny bathroom got a HUGE makeover. It actually was a great sized bathroom for a camper and the changes we made created even more space. Originally we planned on installing a totally new shower pan, but that shower bench you see isn’t just so you have a comfy spot to sit down while showering…it’s housing the plumbing for the outdoor shower!
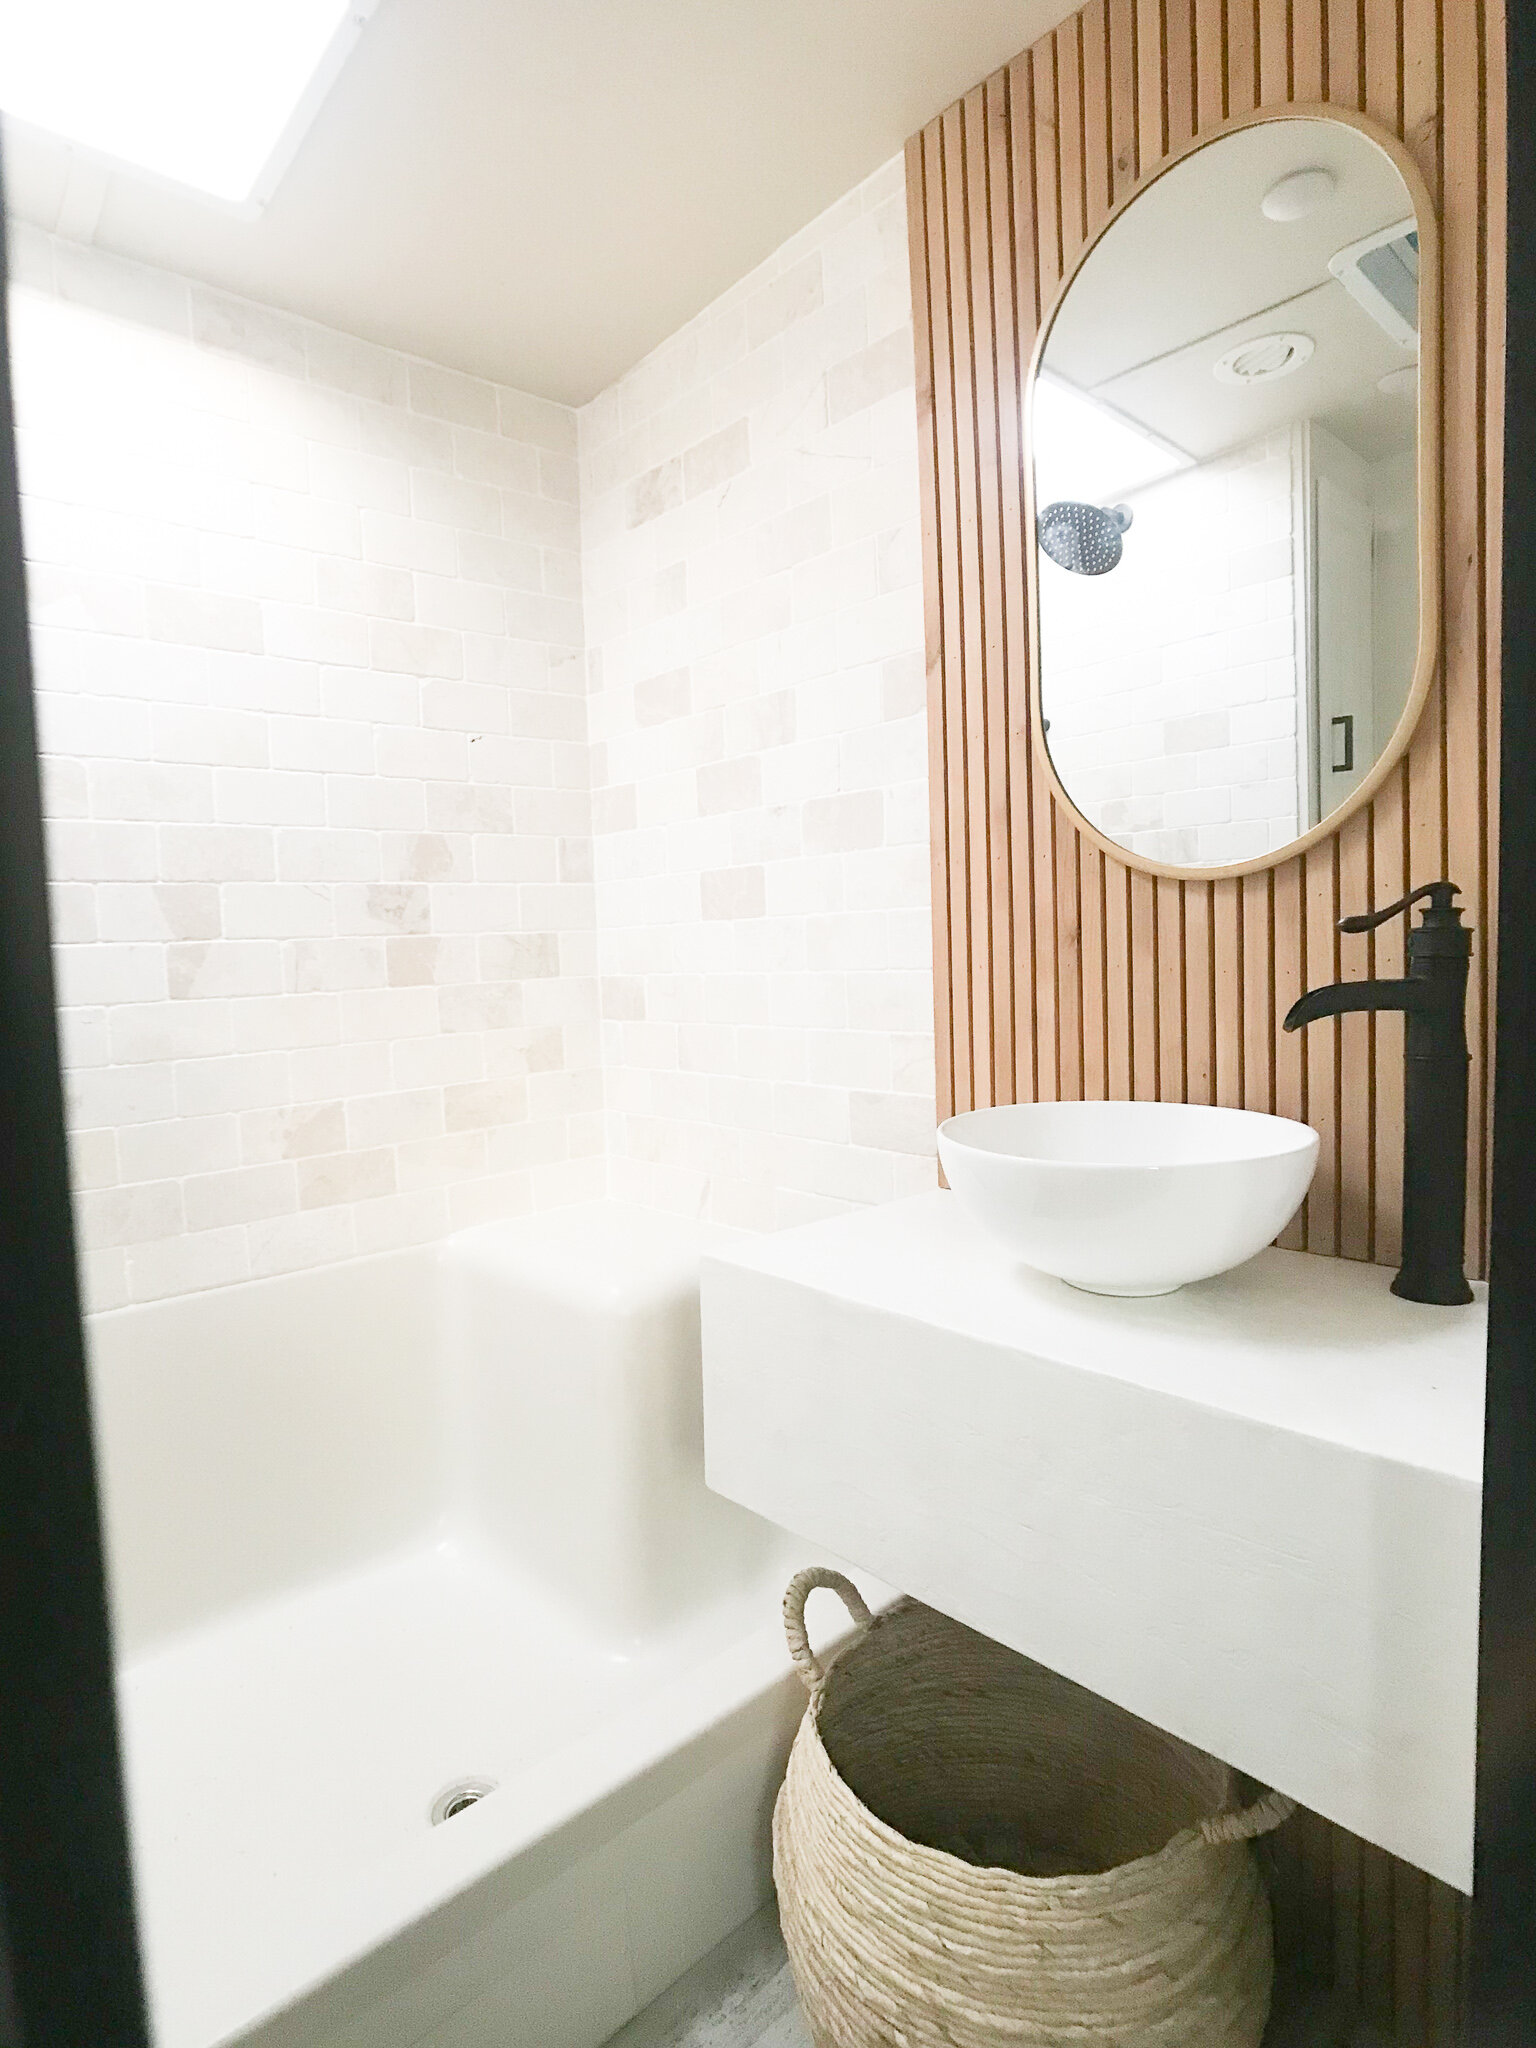
This happens often. You make a plan, start working on the plan, and find something hidden you weren’t expecting! Just remember to always have a backup plan if you plan on making a big change in a camper…removing sofas/tables sometime involved moving some electrical wires/panels or plumbing fixtures! SO…since we couldn’t install a new shower pan, we pivoted and decided to just keep the original (which also saved some $$$). This is REAL tile in the shower! It turned out beautifully! (Again, as I mentioned before, weight was not as much of a concern with this particular RV because it had such a high carrying capacity.) We removed the glass door (its not shown here, but our client hung a shower curtain). We added the stained wood plank wall (it goes floor to ceiling). We built the box the sink now sits on. Its covered in a concrete skim coat. I was so happy with how it came out! I would 100% use this product again! The mirror was from Target. Basket was from World Market.
bedroom


This bedroom was one of my favorite layouts. The king sized bed is on a slide out, so you have plenty of space at the foot of the bed and still have a massive bed in the room. The mirrored door are for a closet. The doors to the far right of the “after” picture are to the….LAUNDRY! Our client actually opted to use this space as a closet instead of putting a washer and dryer in there, but the fact that there are laundry hookups is HUGE.
We removed the cabinet over the bed. These cabinets are so hard to get to and don’t offer that much storage in the first place, we almost always opt to take them out. We installed another floating shelf here. We replaced the original headboard with a wood plank headboard we made.

There it is! There are two full tours of this camper, one before and one after, saved in our story highlights. Link to the “After” here. Link to the “Before” here.
P.S. Our clients that own this camper own a sustainable goods + refill shop in Manhattan Beach. I highly recommend checking out their website! Click Here!
please note: I may earn commissions from links in this post.