DIY Terrazzo Flooring!
Please note I am an Amazon Affiliate and some of these links may provide me with compensation.

I was so excited to get our little vintage Shasta so I could try out some things I wouldn’t necessarily do in a build we knew we were going to be selling because of the uncertainty of how they would hold up. I’ve had good experience with the floor paint I used on this project, so I figured I’d give it a go! I must say…it turned out FABULOUS!

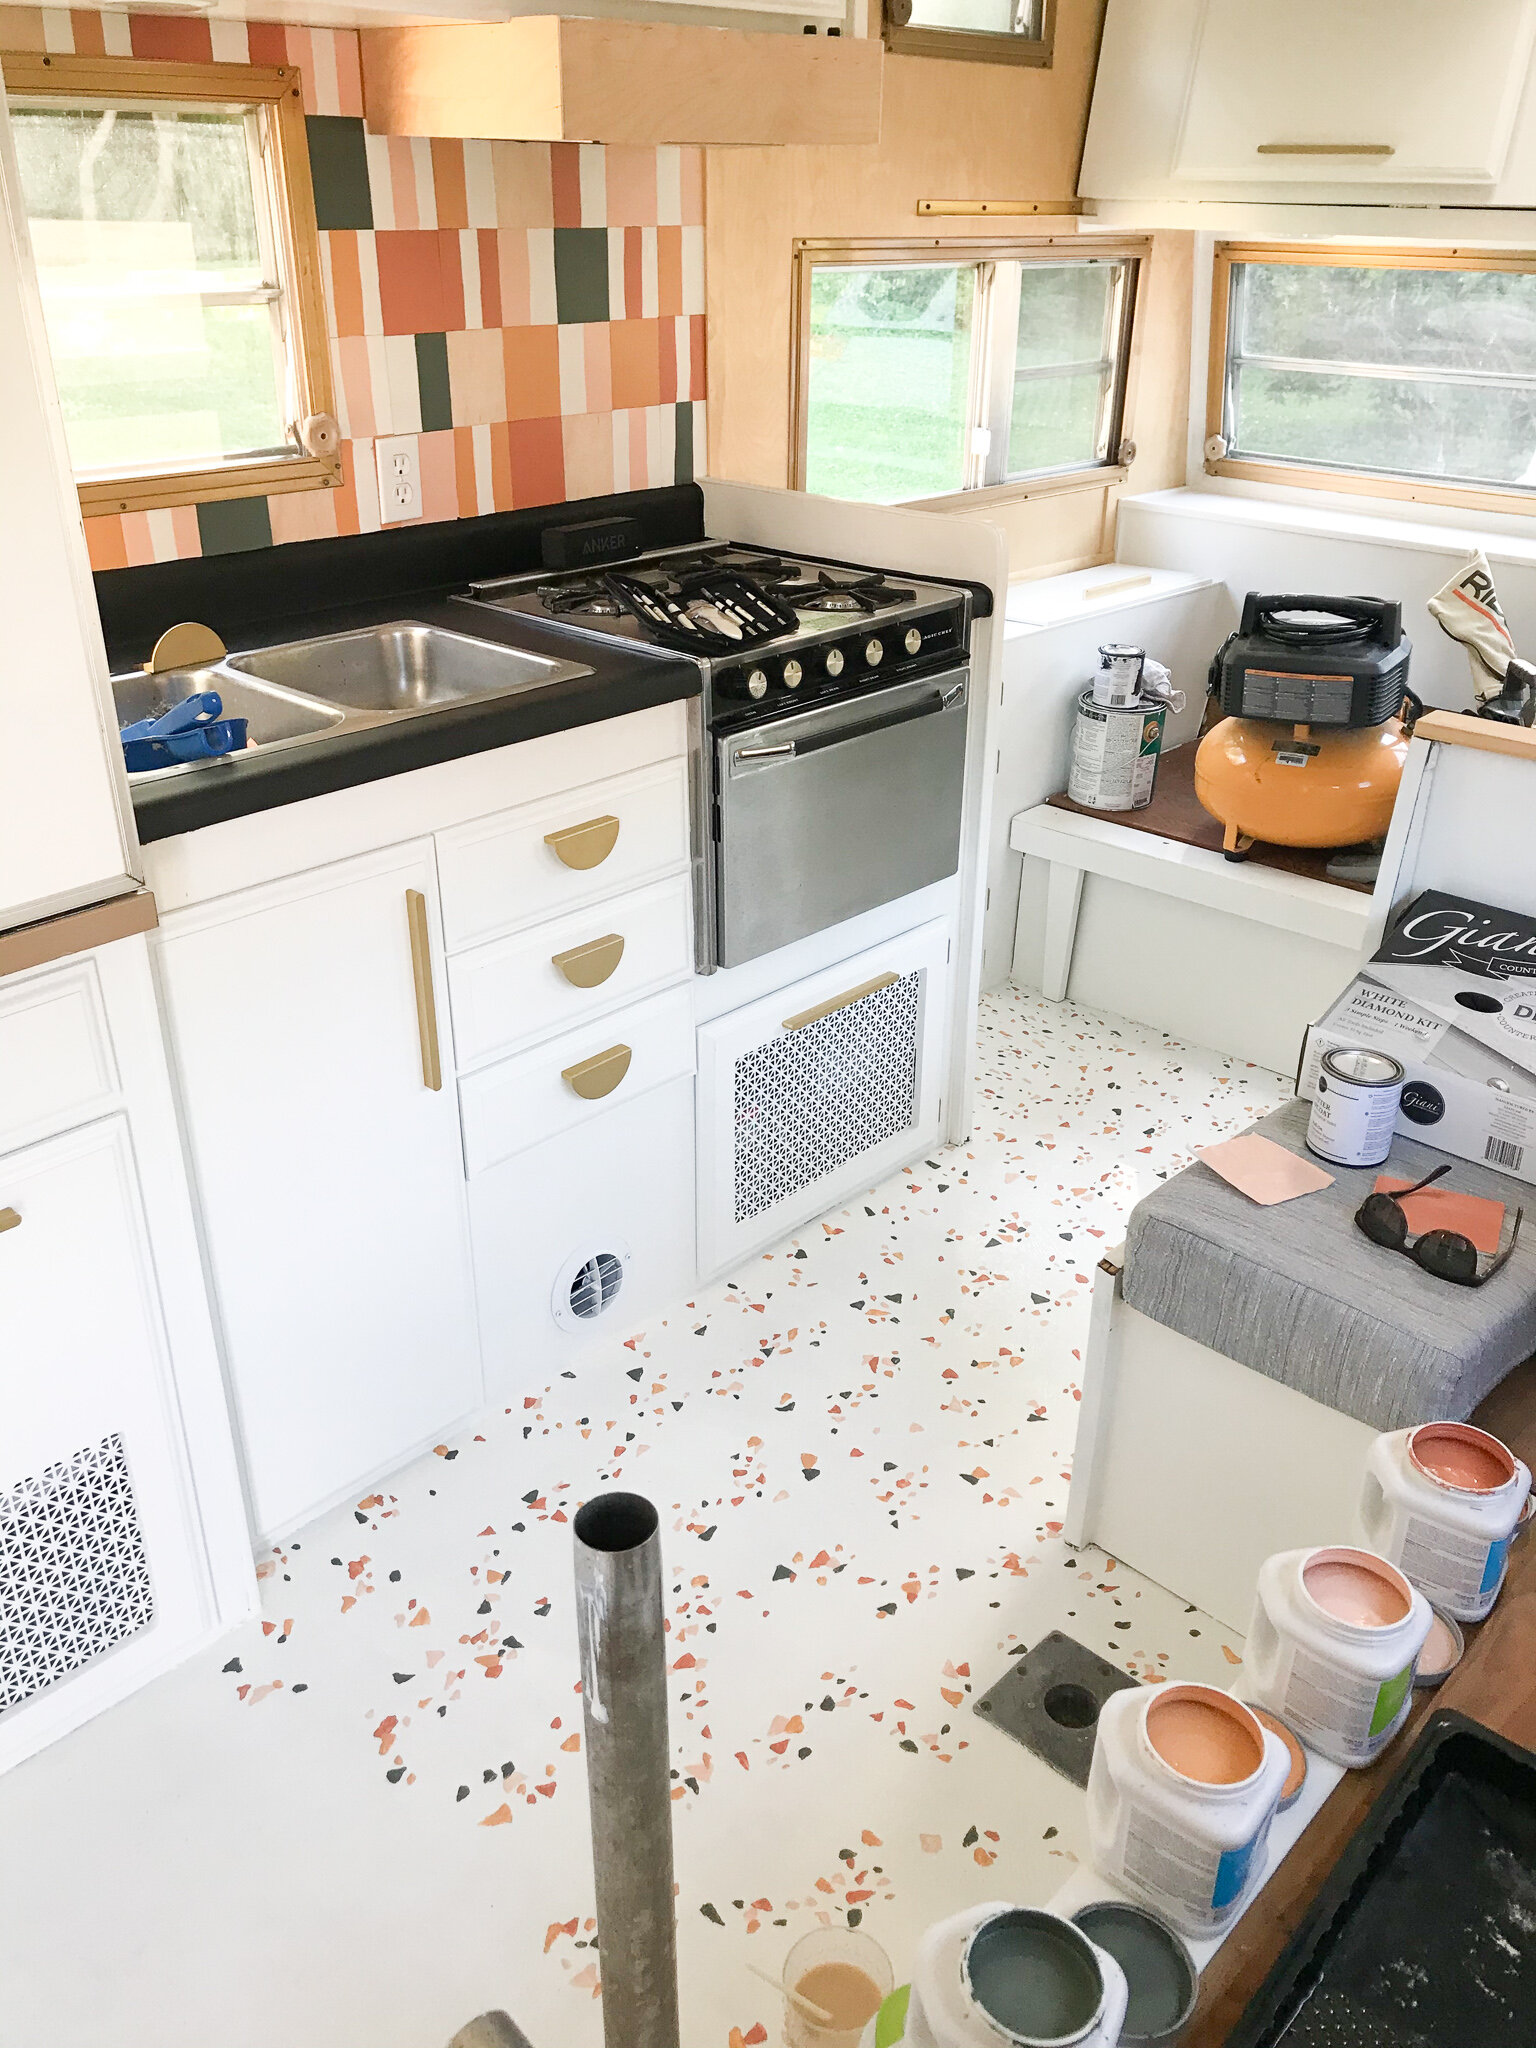
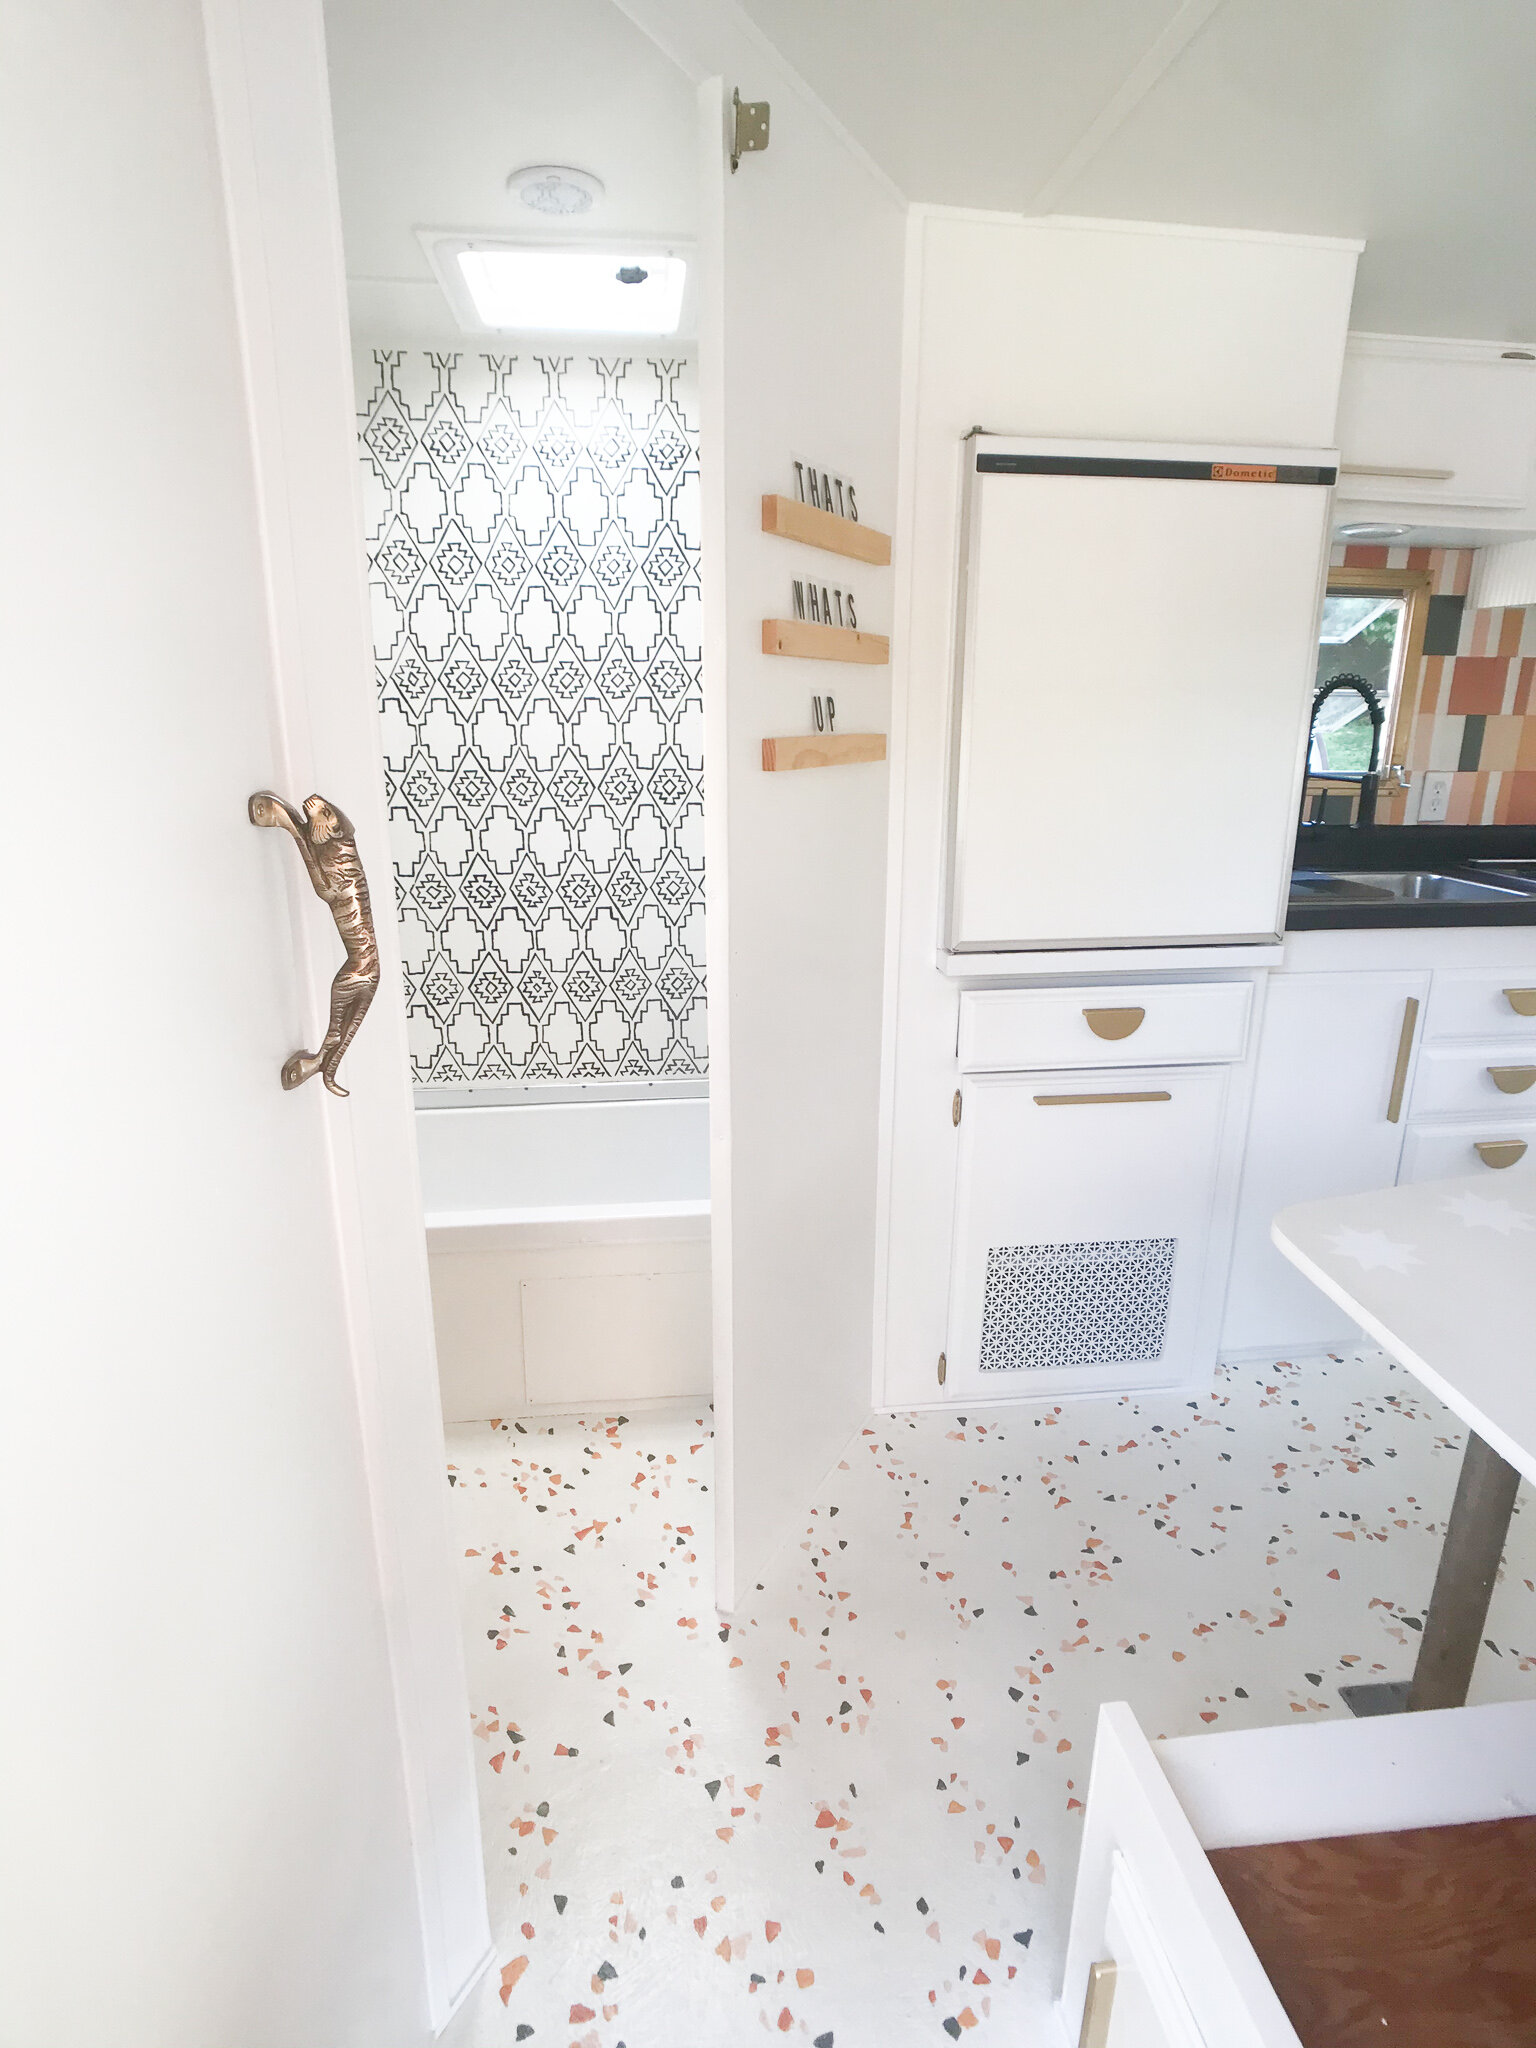
Woowee! Can you believe how different she looks? I honestly didn’t hate the before…she had a total 70s vibe that I can get down with..but we really wanted to brighten her up. Every surface in this camper was retouched or refinished in some way. We debated on so many different options including LVP, plywood, etc. I would have loved to put some sort of real terrazzo or even sheet vinyl terrazzo, but couldn’t find it anywhere! So I had to improvise…
Lets get into it!
How To diy Terrazzo Floor:
Materials Needed:
Sponges/Rags/Cleaning Brushes
TSP or similar cleaning product
Bucket
Water
180 Grit Sandpaper (I like to buy these packs so I have a wide assortment on hand)
Paint Brush (this is my personal favorite)
Roller Cover (I prefer one with a little nap if your floor is textured so it gets down in those nooks and crannies - if your floor isn’t textured, you could use a foam roller!)
Roller (If you’re doing a large space, you may want to get a larger roller + coordinating covers!)
Bonding Primer (like Gripper or STIX if you have stains you need to hide)
Porch + Floor Paint (I use this one from Sherwin Williams tinted to the background color you want)
I bought samples from Sherwin Williams as my “color” in my Terrazzo. Buy these in whatever colors you want!
Sealer - I prefer to use Polycrylic on anything I’m painting white because it has less of a tendency to yellow over time
Artist Paint Brushes (I have a set similar to this and it is SO handy to have around)
Optional: Terrazzo Stencil
Your Surface:

This was our flooring “before”. It was a sheet vinyl and was in GREAT shape for being in a 1978 camper. Not a single tear, dent or major stain! It was pretty dirty, but I’m used to dealing with that. Check with the paint manufacturer to make sure whatever floor paint you decide to use will adhere to your surface!
Step 1:
CLEAN CLEAN CLEAN!
I can’t even tell you how important this step is…but i’m gonna!
If you want your floor to hold up, you HAVE to clean it.
I use a product called TSP. It is an industrial cleaner so wear your safety gear! You can find the cleaner here.
I use a bucket to mix up the TSP and then scrub it with rags and brushes to get down in all those nooks and crannies.
Step 2:
My surface was already fairly “ruffed up”, but I figured it wouldn't hurt to sand it. I used a 180 grit sandpaper. Just be careful not to actually put scratches in your flooring! I use this sander. I like how it can get into the corners really well!
Step 3:
At this point you need to decide whether or not to use a primer on spots on your floor. If you’re working with a new surface you can probably skip this step. While my flooring was really old, there weren’t any stains that needed to be covered up so I skipped on the primer.

Step 4:
Background Paint! This is when it starts getting fun. I started by rolling the paint everywhere I could get to with the roller, starting with the corner farthest away in the camper (or whatever kind of room you’re in!). Make sure and let the flooring dry per manufacturers instructions for your paint! Then I go around and “cut in” the edges with a paint brush. Reapply as needed to get a good solid even color. When it comes to picking a color, I HIGHLY recommend testing your “colors” for your terrazzo on top of the background color. I picked what I thought was going to be a GREAT background color, but it ended up being too dark for the look I was going for once it was on the floor.
Step 5A:
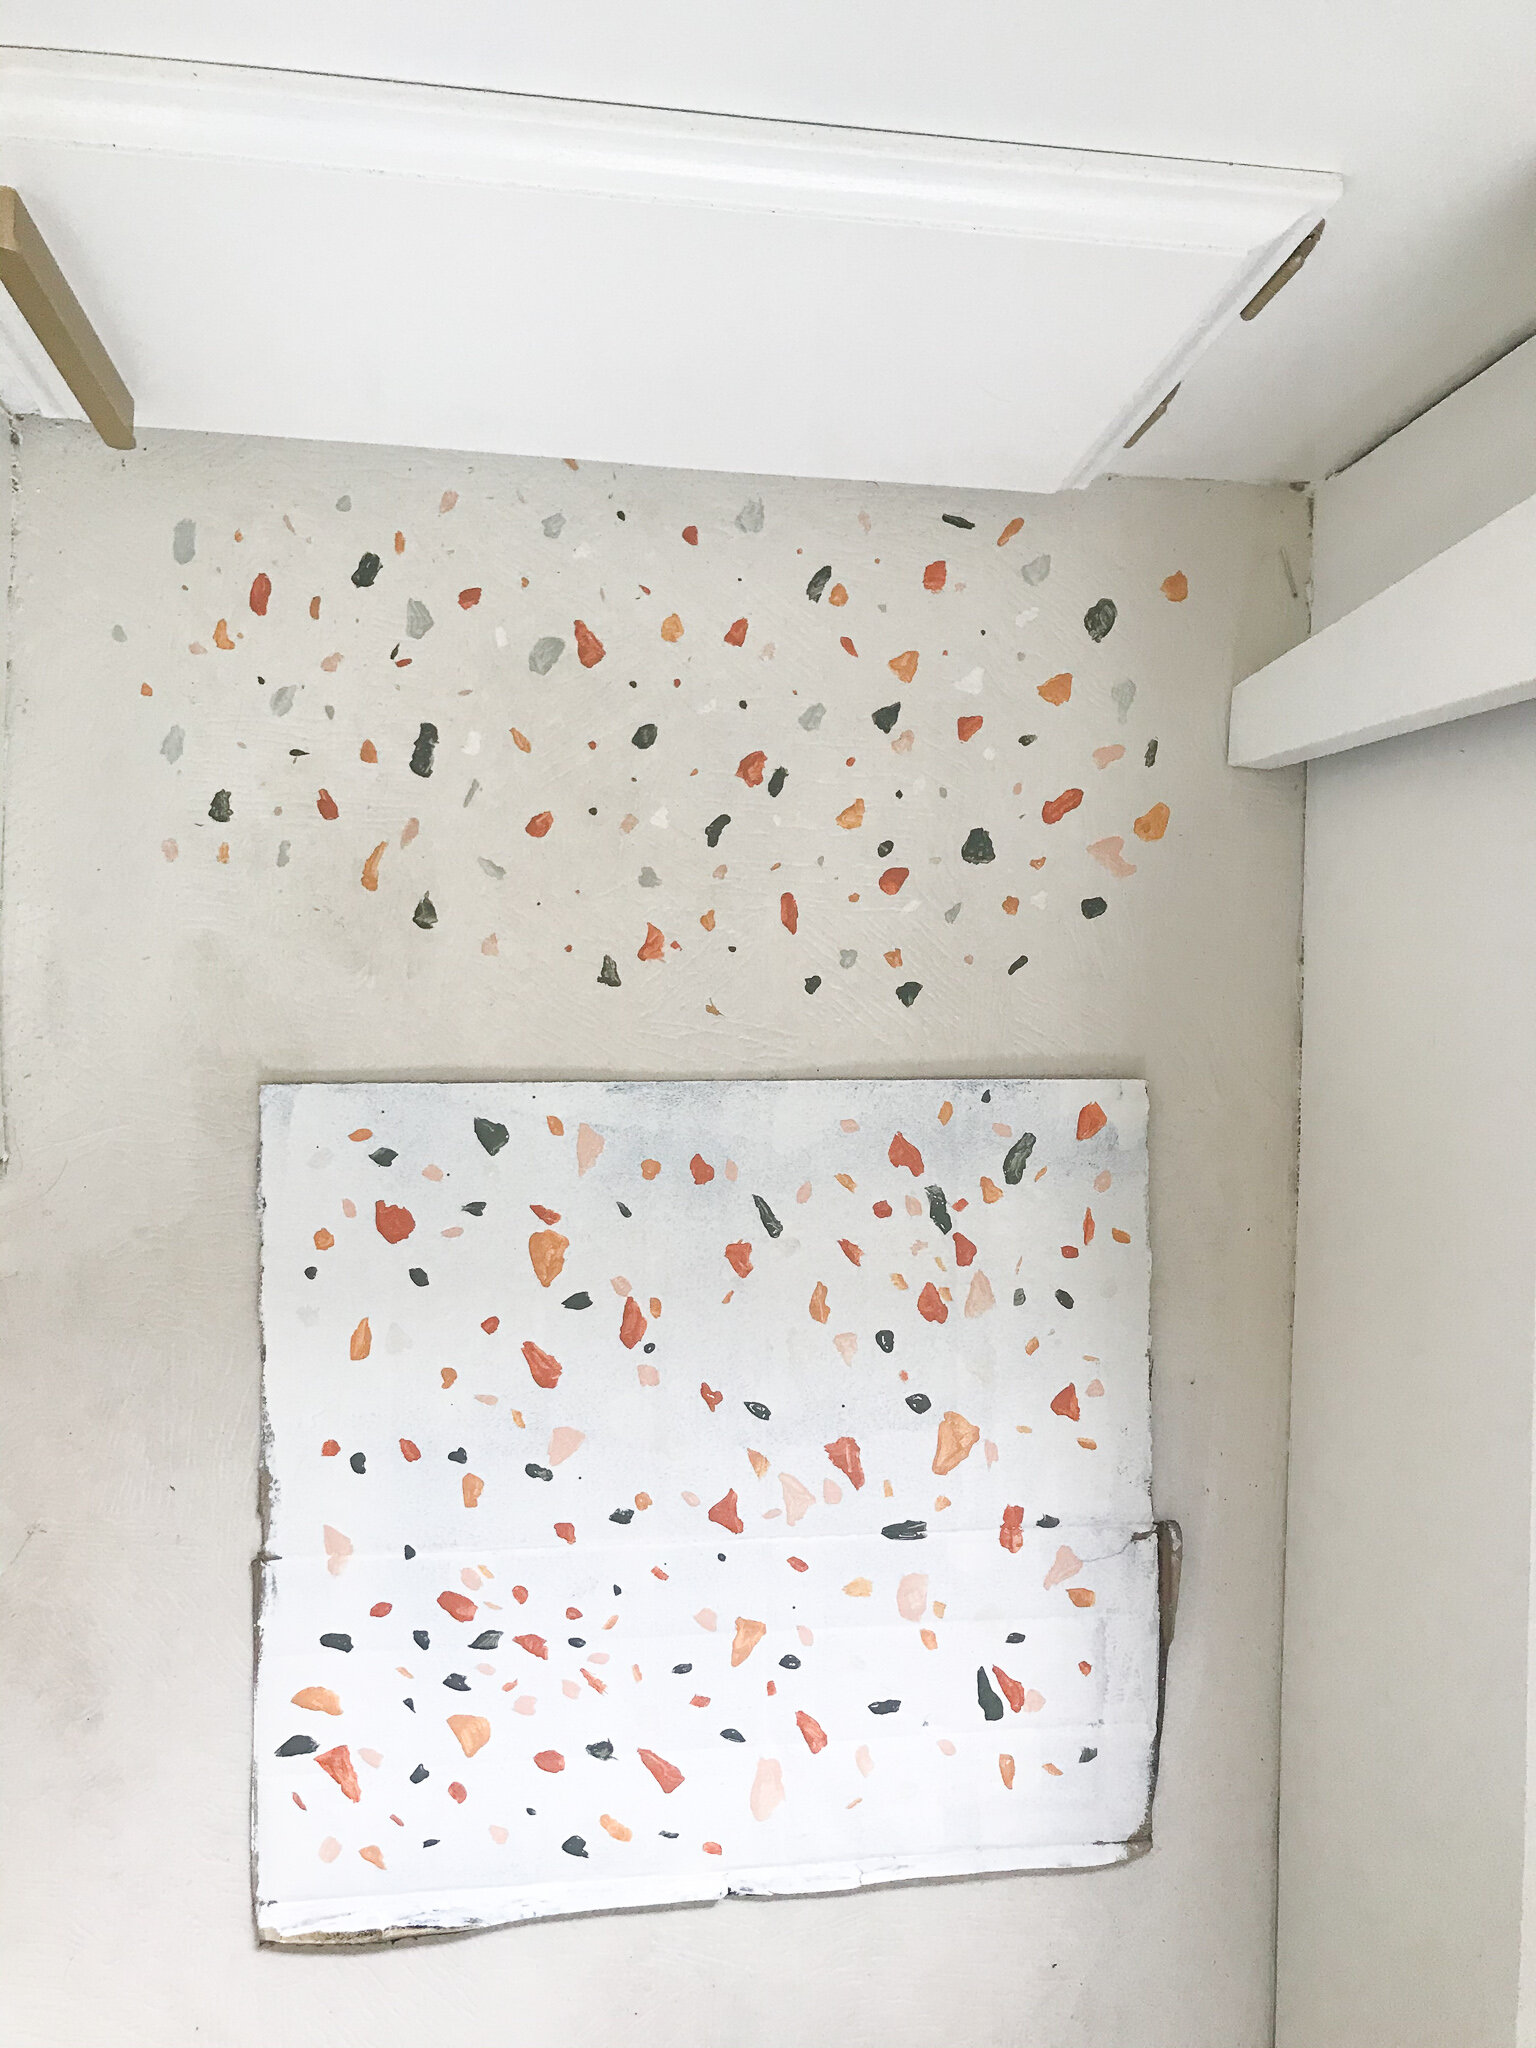
At this point, I HIGHLY recommend practicing on a scrap of wood or anything you have on hand that is big enough to get a good idea of your pattern and colors. I practiced on a piece of cardboard and also my floor since I didn’t like the original color I picked as my background and I was going to be repainting it anyway. The top section is the first section I did and you can see how much better and more natural my “flecks” got on the cardboard piece below. I also eliminated the blue since I didn’t like how it was looking. I’ll show you how I do the “flecks” in the next step.
Step 5B:
If you’ve followed my instructions you should be testing this part on anything but your floor!
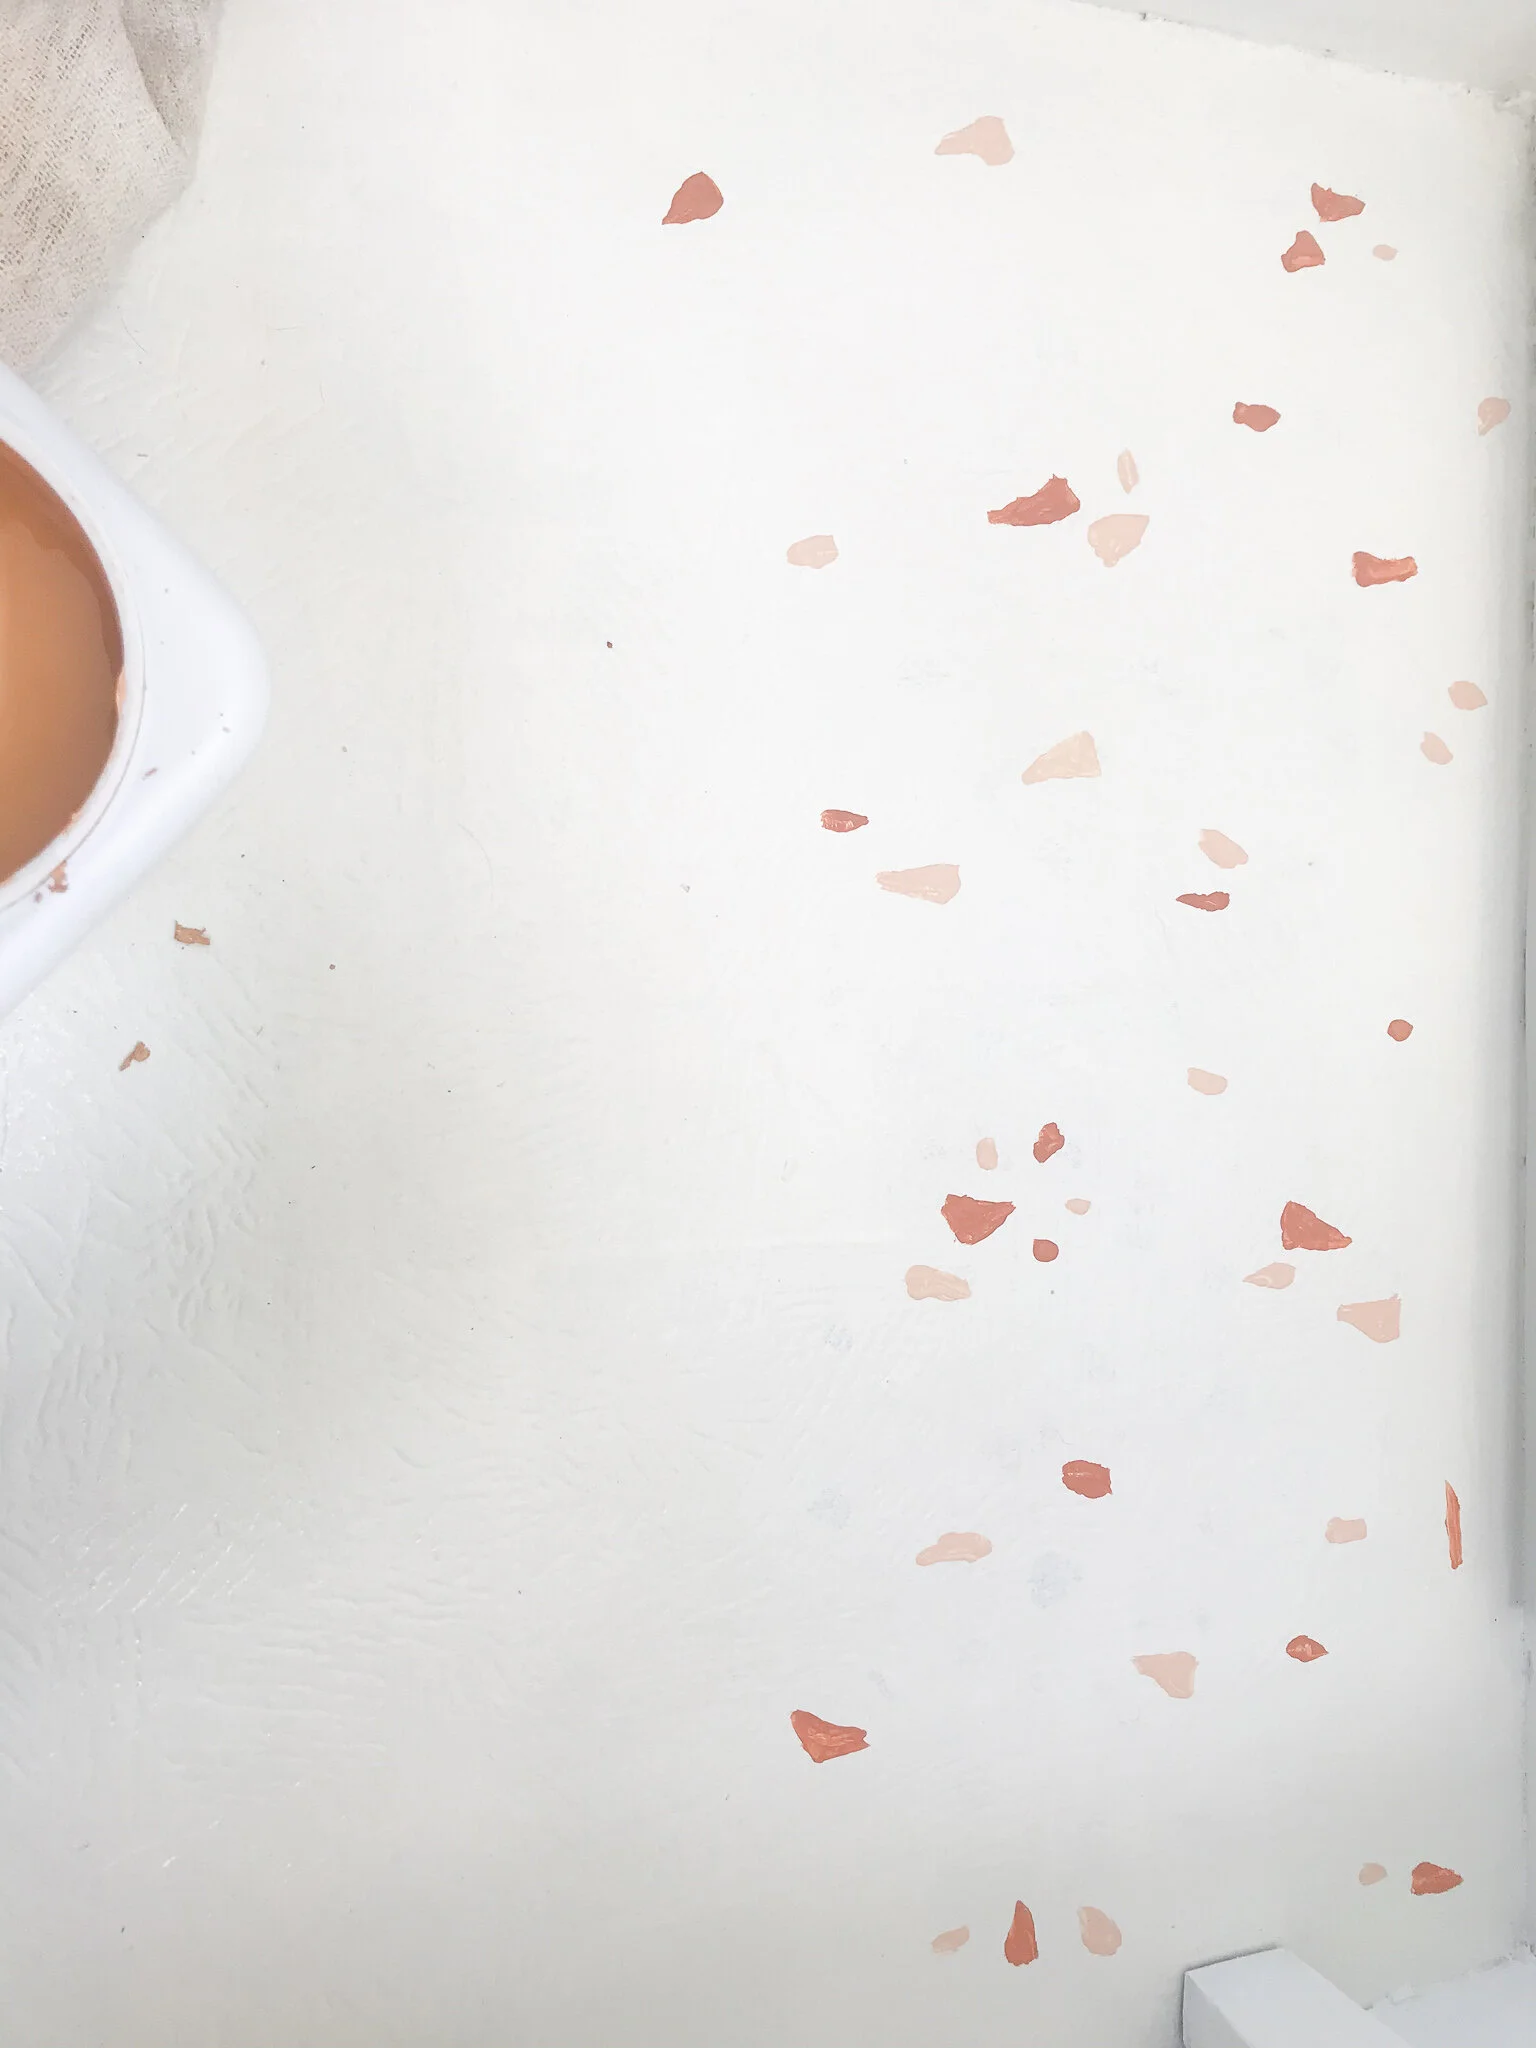
Get all of your paints colors out and within easy reach.
I used an artist brush and started with one color and took a small section and started painting the terrazzo flecks one by one. This is tedious work but it is SO worth it. This is also where you could use the stencil, but I just think it would make it so much harder! If you use the stencil, let me know how it goes! Play around with your flecks, the size, shape and even which brush you’re using…you’ll catch a rhythm! If you look closely at my finished floor I just basically repeated the same 4-5 shapes in different sizes and colors. Don’t worry too much about what each individual fleck looks like…once you have thousands of them on the floor, an oddly shaped one here or there isn’t going to go noticed!
Go small sections at a time and blend them together…I actually would start my next section before I was totally done with the last one to make sure I had a good blend between them and they didn’t start looking blocky or anything like that!

Step 6:
Now here is where you’re really going to hate me….I actually went back and went over almost all of the flecks a second time to make sure they looked solid and vibrant. I know I know…it took forever the first time! The second coat goes much faster and is COMPLETELY WORTH IT!
Step 7:
Apply your Sealer. If you read through the materials list, I like to use this Polycrylic instead of a polyurethane solely because it yellows less over time when applied over white paint colors. The floor paint doesn’t typically require a sealer coat, but you need to do this to protect your flecks! I rolled this on and did A LOT of coats! I think I may have done 5 or 6. You’ve gotta protect your work!

Step 8:
J.K. There is no step 8. You’re done!!!
You guys HAVE to let me know if you try this project! Use #troopnashville on Instagram or Facebook and i’ll make sure to check it out!
XOXO - Madison
Like this post? You might like to see THIS camper renovation we did!